
Pre-Winter Front Door Checklist: 8 Checks Before the Cold
The front door is one of the most overlooked sources of heat loss in a home. A door that fits and seals correctly needs only routine upkeep through winter. One that has developed gaps, worn seals, or a compromised finish will quietly add to heating bills every month of the cold season. This checklist takes about an hour to work through. It identifies the issues worth addressing before temperatures drop.
1. Test for Drafts Before You Do Anything Else
Hold a lit incense stick or a thin strip of tissue near the perimeter of the closed, latched door: along the sides, top, and especially the bottom. Any movement in the smoke or tissue indicates air infiltration. Do this on a windy day for the most revealing results.
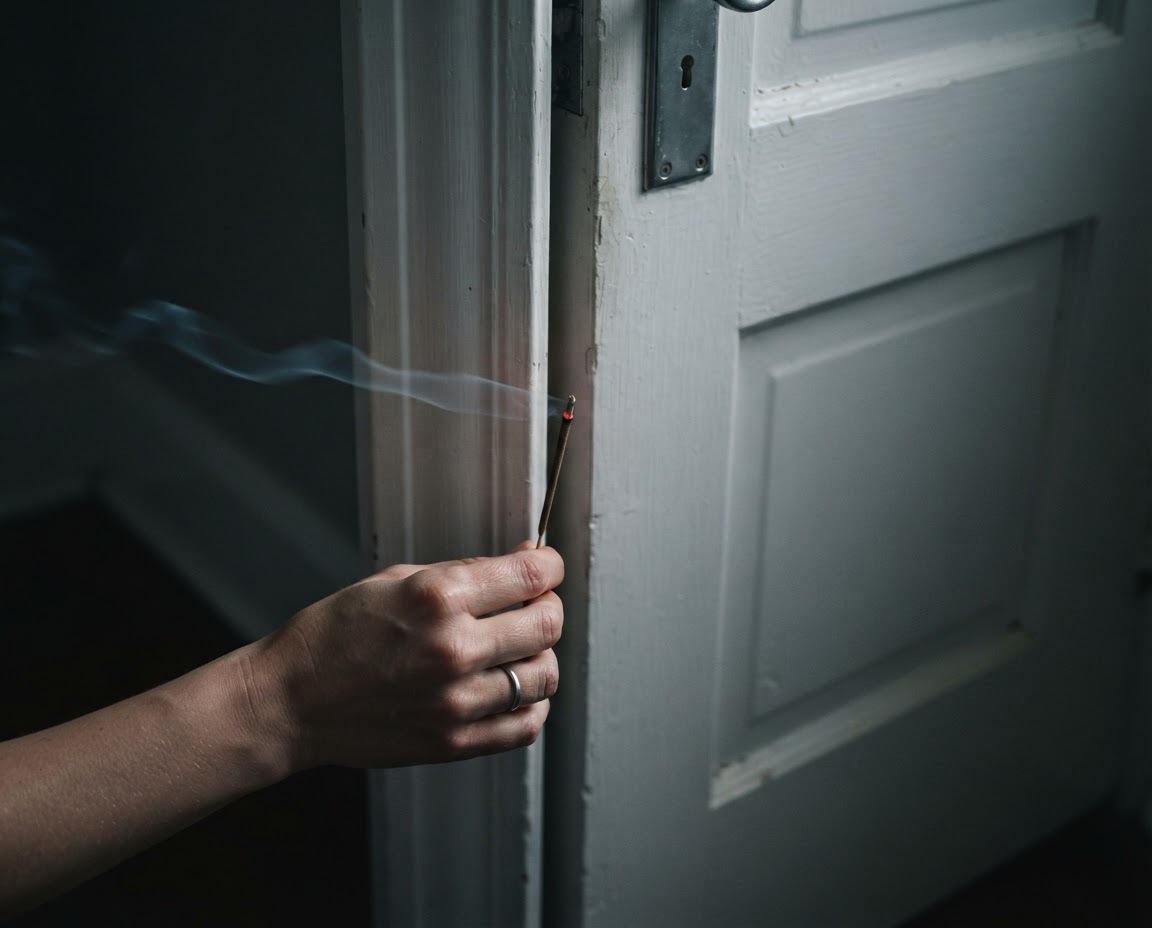
The paper test is another quick method: close the door over a piece of paper and pull. If it slides out easily, the door is not compressing the weatherstripping with enough force to create a seal. This is the baseline diagnosis that tells you where to focus.
2. Inspect the Weatherstripping
Work around all four sides of the door frame and check the condition of the weatherstripping. Press it with your finger. It should compress and spring back. Foam or rubber that has hardened, cracked, torn, or compressed flat permanently is no longer sealing effectively.
Replacing worn weatherstripping is a straightforward job on most exterior doors. Knockety's homeowner guide to door weatherstripping covers the main types, their expected lifespan, and how to replace them correctly.
This video from DIY Playbook walks through weatherstripping an exterior door, step by step.
3. Check the Door Sweep and Threshold
The gap under the door is where a lot of air infiltration happens, and it is often the most neglected. Inspect the door sweep: rubber or brush sweeps that are torn, flattened, or pulling away from the door base are no longer sealing the threshold gap.
Adjust the threshold height if it has one. The threshold should make light contact with the door bottom across its full width. If you can see daylight under a closed door, cold air is getting in all winter.
4. Recaulk the Exterior Frame
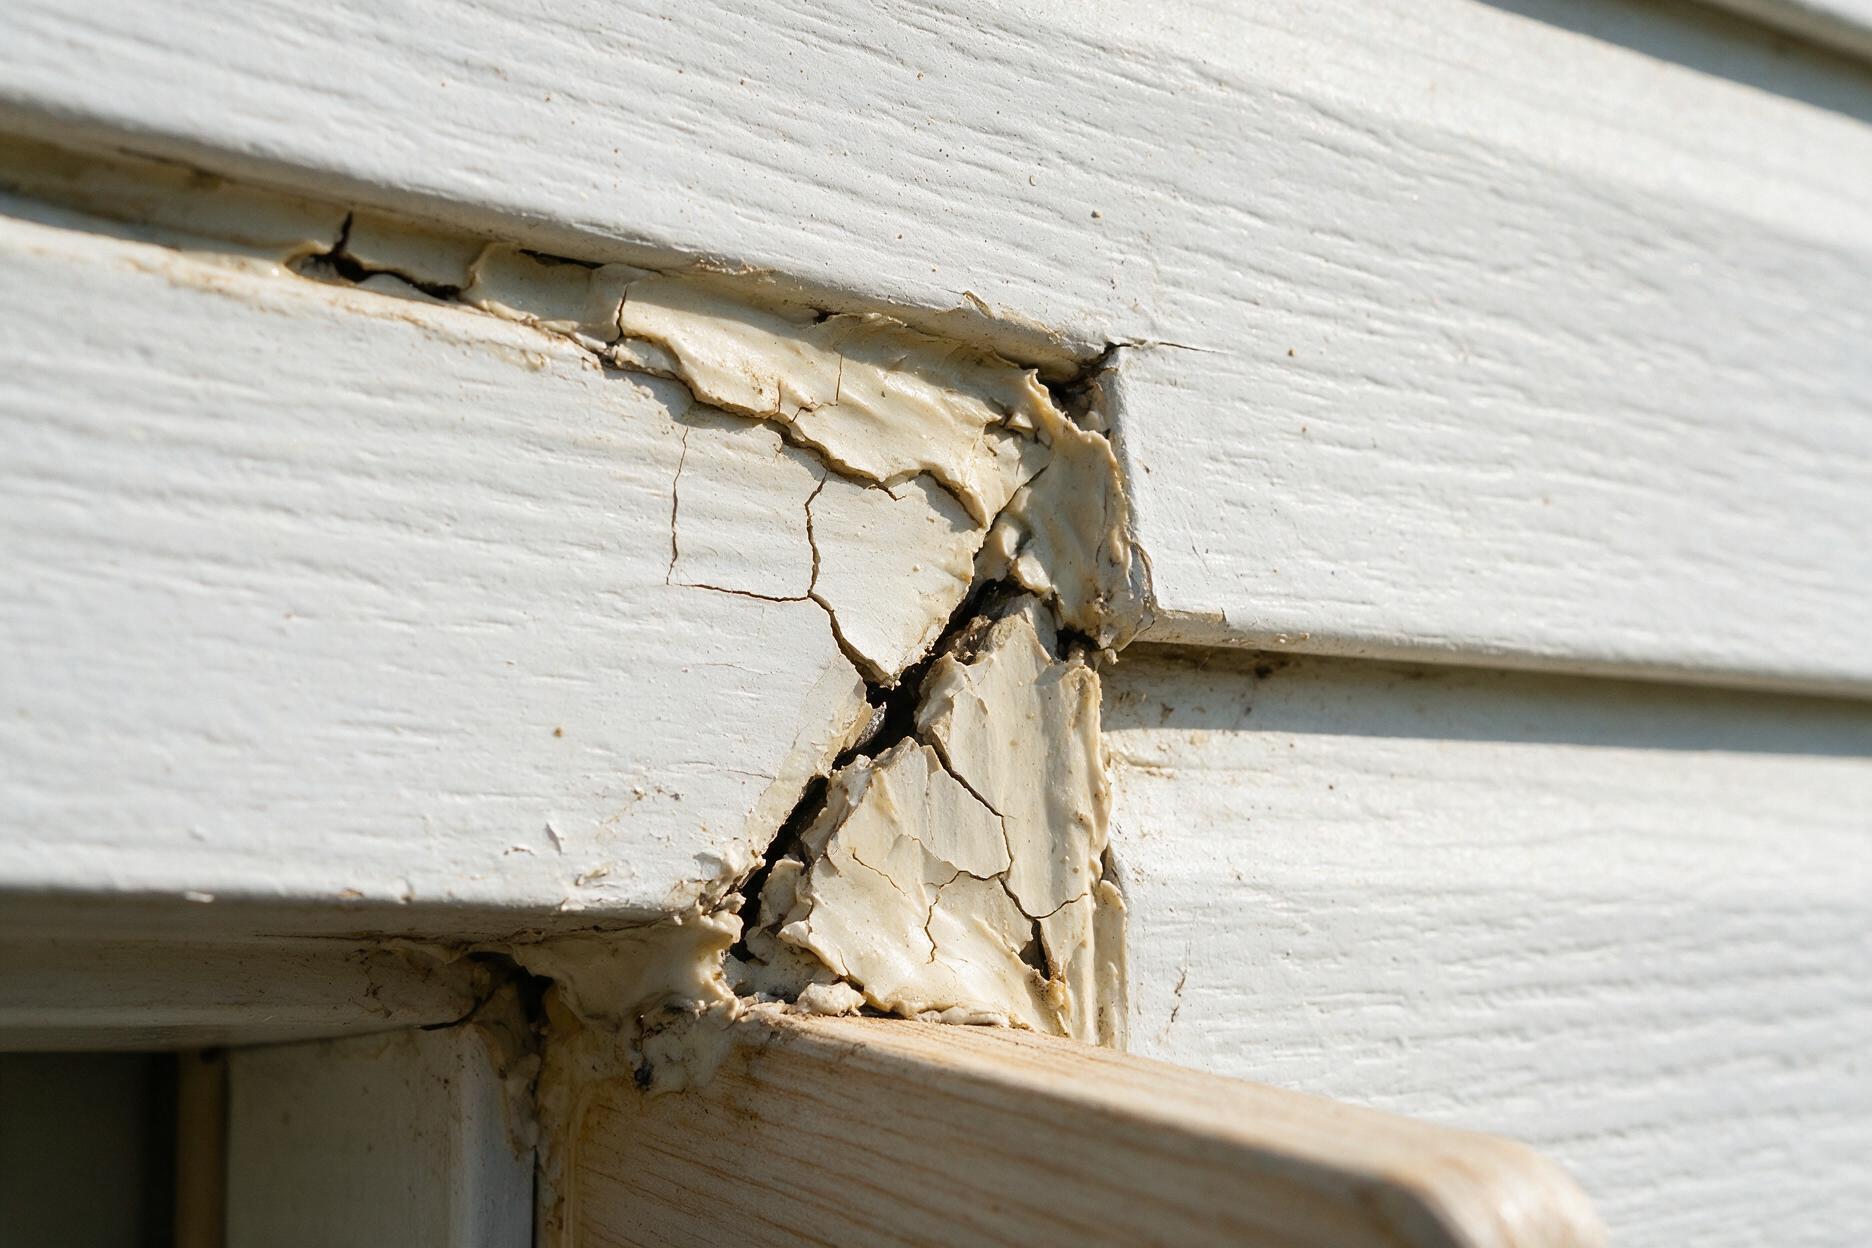
Step outside and inspect the caulk line where the door frame meets the exterior siding or brick. Caulk that has cracked, pulled away from the surface, or dried into a brittle line is no longer waterproof or airtight. Remove any failed caulk with a putty knife and recaulk with a quality sealant rated for exterior use.
This is also the step that prevents water from working its way behind the trim and into the framing. It is a slow problem that becomes an expensive one over time. Knockety's guide to weatherproofing and winterizing your front door covers sealing gaps around the frame and threshold.
5. Lubricate the Hardware
Cold temperatures make metal contract, and hardware that operates smoothly in summer can stiffen or bind in winter. Work a small amount of graphite lubricant or silicone spray into the lockset, latch, and deadbolt mechanism. Check that the deadbolt throws fully into the strike plate without resistance. A misaligned strike plate that is barely functional in warm weather will cause problems in cold.
Hinges on a heavy door can also benefit from a light application of lubricant on the hinge pins. A squeaking or stiff hinge is putting stress on the door frame with every use.
6. Inspect the Finish and Glass
Exterior door finishes (paint, stain, and clear coat) protect the underlying material from moisture. Check for any areas where the finish is peeling, cracking, or lifting, particularly around glass panel edges and along the bottom rail, where water tends to collect.
Moisture that gets under a compromised finish causes problems that compound over winter and can require significant repair by spring. Address any finish failures now, before freeze-thaw cycles work water further into the damage. Knockety's post on how winter sun fades and damages a front door explains why the low winter sun heats a door unevenly.
7. Check That the Door Hangs Square
A door that has sagged or shifted in its frame will not compress the weatherstripping evenly on all four sides, so it cannot seal correctly regardless of what you do to the weatherstripping itself. With the door closed, look at the gap between the door slab and the frame on all sides. An even gap all the way around indicates a well-hung door. A gap that widens at one corner and narrows at the opposite one indicates the door has sagged or the frame has shifted.
Tighten hinge screws on all hinges. Loose hinge screws are a common cause of sag in heavier doors. If screws will not tighten because the holes have stripped, longer screws that reach into the structural framing behind the jamb will reset the connection. Knockety's guide to winterizing doors and windows covers spotting the alignment gaps that tell you a door needs this.
8. Know When Repair Becomes Replacement
A well-maintained door in good condition responds to this checklist with minor adjustments. A door that has warped significantly, whose frame has shifted beyond shimming, whose finish has failed repeatedly, or whose core has swollen or rotted is telling you it has reached the end of its useful life.
A new door that seals properly beats a patched old one every winter after. Knockety builds fiberglass front doors and solid wood front doors with multi-layered cores made to resist warping, double-pane glass on doors with glass, and weatherstripping fitted at the factory on prehung units. Depending on the model, they rate at a U-factor of 0.24 to 0.42.
Timing matters if you want it in before the coldest weeks. Custom-built doors take about 5 weeks: 4 weeks to build in Houston, then about 1 week in delivery. Quick Ship doors, hardware and samples arrive in about 1 week. You can preview our doors on a photo of your own entry for free, and order real finish samples to see the color in your own light before you decide.
Common Questions
Pre-Winter Front Door Checklist: Frequently Asked Questions
How do I check my front door for drafts?
Hold a lit incense stick or a strip of tissue around the edges of the closed, latched door, especially along the bottom. If the smoke or tissue moves, air is getting through. You can also close the door on a sheet of paper: if it slides out easily, the weatherstripping is not sealing.
How long does it take to winterize a front door?
About an hour for the full checklist on a door in reasonable shape. That covers a draft test, checking the weatherstripping and sweep, recaulking the exterior frame, lubricating the hardware, inspecting the finish and tightening the hinges. Replacing worn weatherstripping or a sweep adds a little time.
How do I know if my weatherstripping needs replacing?
Press it with your finger: good weatherstripping compresses and springs back. Foam or rubber that has hardened, cracked, torn or stayed flat is no longer sealing and should be replaced. Replacing it is a straightforward job on most exterior doors.
Why does my front door stick or not seal in winter?
Usually because the door has sagged or the frame has shifted, so it no longer meets the weatherstripping evenly. Loose hinge screws are a common cause, and tightening them or fitting longer screws that reach the framing behind the jamb often fixes it. Cold also stiffens hardware, so lubricate the lockset, latch and deadbolt.
When should I replace my front door instead of repairing it?
Replace it when it has warped significantly, the frame has shifted beyond shimming, the finish keeps failing, or the core has swollen or rotted. At that point maintenance cannot make it seal. Knockety custom-built doors take about 5 weeks: 4 weeks to build in Houston, then about 1 week in delivery, so plan ahead of the coldest weeks.